Showing posts with label vintage. Show all posts

Tuesday, 5 March 2013

Finally!...Vintage Stockings!!

and I am NEVER doing them EVER AGAIN!!!
Okay, this was a kind of fun experiment but there are a few things I have discovered from the 40's-50's knitting pattern.
  • If there's a hard way or an easy way to do something, let's do it the hard way! Like knitting a sock flat despite the fact that we clearly know how to knit in the round because we do it for the toe of the stocking and ONLY THE TOE!!
  • That sewing miles of seams obviously has some moral lesson in it that escapes me because there is one looong one right down the back of the stocking and, just for good measure there are TWO seams on either side of the foot to join the sole to the instep! 
  • And just to make sure that you smarty pants don't try and squib out on all this convoluted construction, let's use a very simple appearing stitch that is IMPOSSIBLE TO CONVERT to a seamless version!!


You see I had a few issues with it. It was far and away the most frustrating thing I have ever knit and I've knit a lot of socks and even over the knee socks so you wouldn't have thought this would be such a fraught project!

See? Strange construction!!
 I unravelled the heel and foot portions over and over again, trying to make sense of the instructions. But finally, I climbed that mountain! I completed the Stockings!!


 I still don't like how the heel is formed, it's not smooth like a heel at all but pointy. But I have completed the pattern and BOY! am I thankful!!
:)

Thursday, 15 November 2012

Knitted Vintage Dress Experiment

I got brave and set about attacking a large project and knit a dress from a vintage pattern. I had just the pattern I wanted to try and it didn't look too complicated (don't you hate it when you tell yourself that on no other evidence than the picture??)
I had two cones of Gemini Acrylic 5ply which I thought would make an interesting contrast (besides realizing that the blue was going to run out long before I finished the whole dress. Ah well. Needs must.)  
And it was easy...too easy! 18 inches of stocking stitch which I chose to do in the round since the idea of having to do it separately twice  made me feel ill! But it seemed to go on FOREVER!! But finally I got to the end of that and started with the red for the bodice.
Now it started to look more like a dress and not an endless tube! It wasn't difficult doing the shaping for the v-neck and the armholes (had to go back to straight needles for that!) and quickly progressed through the sleeves. But that's where I finally hit some problems!
Do you see the ruffle here? It took me 5 tries to get the directions right! I'm the only one who can probably notice but the increases on one sleeve are much looser than the other sleeve. It took me a while to figure that out. And the lace just before the ruffle? That I fudged...a lot! I ended up getting a pattern from my Barbara Walkers stitch collections to find a pattern like the one I could barely see in the picture and used that. I simply couldn't get the pattern as written to make any sense at all!! But at last...I finished it!
...well, not quite...
As hard as I tried I couldn't understand the instructions for the crocheted edge that goes around the neck and ruffles. Crochet is SO not my thing and in the end I fudged this too. Or I might have been doing as I was supposed to but I just followed what the picture looked like. I also added it to the skirt because I thought it looked nicer that way.
So, huzzah!! I did it!
But there is something here you may have noticed and I didn't until I tried it on. The shoulders are hugely wide!! You'd have to be impossibly well built to be able to wear this or wearing killer shoulder pads! 
It hangs over my shoulders by about 5cms. I tried to convince myself that it wouldn't matter but it does, oh heck it does!! So it's been relegated to the naughty corner so I can cogitate on it and figure out what my best option is with it. It might have to wait till winter. It is truly horrendous trying this on in 30C heat!
But it has been a great experiment :)

Happy knitting :)

Sunday, 16 October 2011

Project Completed!!

I've done it! The vintage jumper is completed! I'm very happy with it, it fits! All I need to do now is wash it and hope a little of the scratchiness washes out. Here is what I did today.
I finished all the components this afternoon. There were seven in all, a front, a back, two arms, a collar strip, bow and loop.
They fit together quite well after I figured out which side each of the arms belonged on (the pattern directions weren't very helpful in that regard.) and it looked very impressive.
I ended up tacking the collar down becasue despite the suggestion that folding it down was all that was necessary I soon realized that unless I wanted to wear the jumper and endlessly fiddle with the collar because I was sure it was rolling up I'd better tack it down. I also tacked the bow in place too because it kept flopping forward.
I like it :)
Now I have to find another project otherwise my fingers are going to start twitching. I've been knitting pretty much solidly for the past weeks and I don't know what to do without something to work on.
Happy Knitting :)

Saturday, 1 October 2011

Collecting Vintage Knitting Patterns...

...is a fine thing, some so elegant and others so "what were they thinking!!!" but since my favourite period of history is late 40's, 50's and early 60's, most of the time it's elegance that wins the day.

Mind you, I've never really had the courage to tackle a garment from my many hoarded pattern books.
Oh sure, I knit some baby singlets for my neice from one of the family booklets, but I heavily modified that because I refused to knit two tiny fronts and backs of said singlet when I could streamline the whole thing by knitting it in the round!
Which I did!
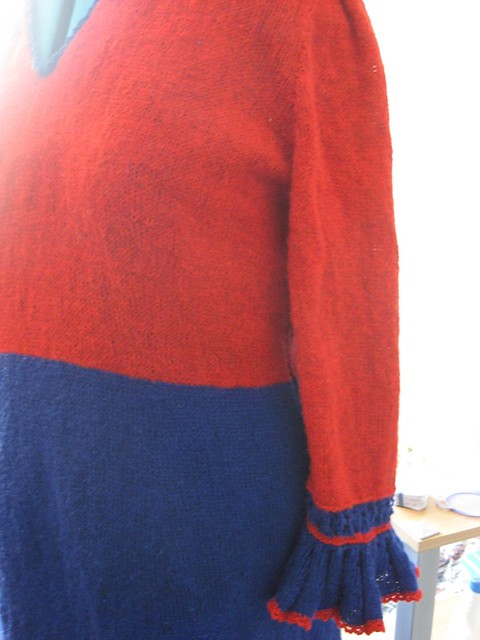
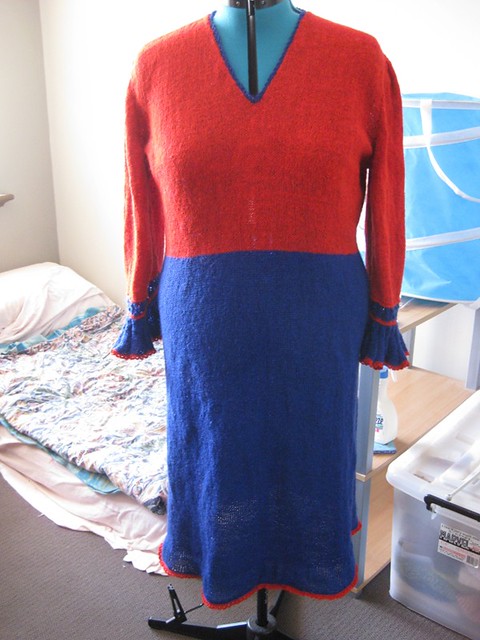
 And I also had a go at an adult garment which I did follow to the letter of the pattern but since it was largely a huge plain knit that folded up to be a lovely cape over the shoulders it was more the post-knitting construction that I found very challenging (first I had to figure out from what direction the folding was supposed to start!).
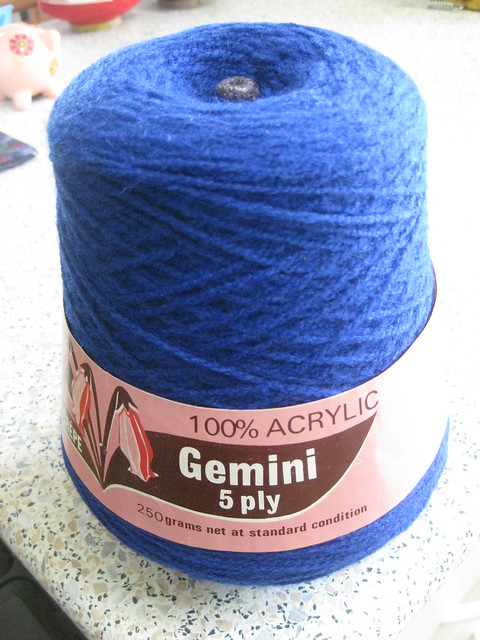
As you can see (and even if you can't I can!) the colour changes just slightly after the first three folds. This is because I didn't realize that the pattern would eat up 1 100g ball and when I went to buy another there were no more to be had in that particular dye lot. Of course. 

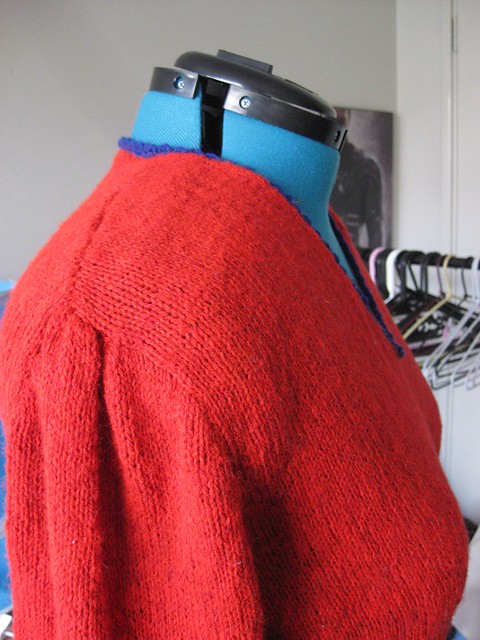
In fact, if I were ever to knit this again (God Forbid!!) I would use smaller needles with the same ply (5 ply) or the same needles I used and a heavier ply, probably 8ply. I had to tinker with the closure because it was so big it kept falling off my shoulders and the fronts gaped forward in an unbecoming way. But it has turned out really nicely despite all it had going against it.

So taking this all into account I was a little nervous taking on a proper garment, you know, the sort that's supposed to fit MY arms and MY body, here in the 21st century without the phenominal undergarments that kept everyone looking so neat and poised (if slightly breathless) in the pretty pictures. So I thought I would choose from the early 60's patterns rather than set myself up for disappointment first off by tackling something from the form fitting and slightly smaller bosom that I might possess era of the late 40's and 50's.

This being my aim it was easy to choose a pattern because I'd loved the appearance and the neckline of this one particular pattern from the day I first saw it. It doesn't even have a cool name! It's just Jumper 751.
Isn't it sweet?

But it presents its own challenges. As you may have noticed from previous jumpers, I love seamless construction! You do all that work and at the end there is practically no seaming to do and no sleeves to try and smoothly attach to the body of the jumper without it getting bulky. Alas, that is exactly the construction of this 60's jumper. A front, a back and two sleeves. Oh, and a collar. 

All of which have to be seamed together before I can see whether I have succeeded in making a jumper that I can wear or have wasted time and effort to produced something that will haunt me for all time!!

But despite initial terror and disquiet I have soldiered on. I have about 12 balls of this Baby Bella stuff I bought from Spotlight, 100% wool which will do pretty well despite the fact that it's a very uninspiring cream colour. I've upped the needle sizes since the largest size is for a 36 inch bust while mines about 40 (if I hold the tape a bit tight). So hopefully the slightly heavier gauge of the wool and the larger needles will cover any differences in the size of the finished garment so it actually fits me!

I cast on....
Not bad. The greatest difficulty I came across was when dividing for the neck edge and the fact that the finished sides right at the very top seem slightly different lengths. Not much but enough for me to notice. But I've steam ironed the finished front and I'll wait and see how everything turned out and decide then if it's worth while unravelling about 4 rows of each and then knit them back up the same size. 
So, so far, so good. Now I've just cast on for the back, done the ribbed hem and started the plain knitting until I get to 15 inches long. Wish me luck!
Happy knitting :)


Friday, 22 April 2011

Everything old is new again!

I have been collecting vintage patterns for ages and have been desperate to actually try and knit something from one of them so I took the plunge! I chose a simple looking shawl/shrug-like covering that had no lace involved and only one page of instructions!

Perfect!
I cast on with a lovely lavender purple acrylic I already had in 5ply and using the needles suggested, bravely cast on! I used a circular needle however for this since I was pretty sure I wasn't going to be able to keep control of over 100 stitches on any of my straights, however long they were!
The knitting itself was pretty boring and not really that well explained in the tiny amount of instruction. Once I worked out what I thought they wanted and placed stitch markers to keep track of stitch increases it got a bit easier...right up to the point, half way through when I ran out of yarn!
I only had that one ball but never fear! I still had the ball band and an intended visit to town (118kms away!) for the next day. No problem! I'll just buy another ball tomorrow.
But alas, disappointment and frustration greeted me! Although I could find the exact yarn required, I could not find the exact dye lot! Not for love or money! So I bought another ball as close to what I had begun with as I could and consoled myself with making it a design element.
So off I went again and soon (although not nearly soon enough to suit me!) I had finished and I had...a great big sheet of knitting.

Now to follow the very brief instructions on how to construct the shawl from this great sheet I had before me.

First mistake: I decided to iron it so it would lie flatter and (I thought) be easier to fold into the desired shape. Result? I ended up with an enormous great sheet of knitting that required either the whole dining table or my ironing board to try and make sense of what I had before me.

Second mistake: It doesn't matter how hard I try I will never get the desired shape if I keep confusing the bottom of the shawl with the top. Once I'd realized what I was doing wrong I did actually start to make headway!

I soon realized however that there was simply no easy way to do this! Folding down the neck and the final edge of the shawl was relatively pain free but then there was the issue of the four tucks, great big long ones! In the end after much experimentation and annoyance I had to sit and labouriously tack together each fold using long quilting pins to hold the folds in place on the right side and a metal ruler of the right dimensions to stabilise the tucks sufficiently so I could sew them together from the back. It took all day.
Then I had to shape the front opening by folding the tucks together to give it the sweeping appearance around the body. Not too hard but then I realized that all the tucks just flopped down from their positions unlike the one in the picture where they seemed to sit with no effort at all, perfectly upright. Damn! Out came the needle and thread again.
I had to tack each fold to where it needed to sit and that was difficult without the stitches becoming to obvious! But after another day of handsewing it was done! I crocheted around each front closure so it looked tidy and finally swept it around my shoulders...
It seemed a little...big?
I attached the hook and loop closures and sewed on the ribbon but it was no use...

It was just too big and wouldn't sit nicely on my shoulders and I didn't like how the closure hung.
Poop!
So I looked at it for another day and decided what I was going to do. I lay it over my shoulders and folded the front edges over each other so the closure became slightly assymetrical. That way I didn't have to add a bulky pleat to the back to try and take out excessive length which would ultimately ruin the drape of the shawl and I didn't have to fold over the front edges, creating clumsy, bulky material at the front. I sewed one hook and loop closure to the centre of the closure going under the top to fix it in place and the two hook and loops on each corner of the top layer to anchor it to the front of the shawl. Then I sewed two faux ribbon ties to the two spots so it kind of looked like they were keeping the whole thing together. It was an improvised kind of solution, I used buttons to fix the ribbons in place but I may sew them down later since they still tend to move slightly and I don't like it when they don't sit even. But otherwise? I am very pleased with the results :)

It sits beautifully, is soft and warm. Not the least nasty and squeaky like some of the old acrylic used to be like. You can clearly see the colour changes between balls of wool but fortunately they fell on a fold so the change isn't as apparent as it might otherwise have been had it happened midway through a length of plain knitting. It falls right on the fold ridge. Couldn't have planned it better if I'd tried :)
So there we have it! My first truly vintage pattern worked and completed. And now I know some things.
Most notably: Few instructions are NOT necessarily a good thing! It's nice to figure somethings out yourself but if there hadn't been a picture with this pattern I would have totally failed!! I'd never have figured out how to put the thing together and even with it there are elements were I had to go "Stuff it!" and improvise. It was necessary and now I have this lovely garment from a beautifully attractive time brought back into the present.
I am satisfied!

Happy knitting :)

Wednesday, 26 January 2011

The Modern Vintage-y Look

I bought these great ball of yarn from Spotlight, Moda Vera Irena. They're so soft, almost like chenille. And I wanted to try making a bag, sort of a market/carry bag. So, after cannabilising two other patterns from Ravelry, one the bottom of a bag and the other is the lace pattern from an in-the-round hat, I improvised the rest. I think it turned out pretty good.


If I did it again I'd do the gap between the handles different. I knit the stitches together instead of casting off because I thought it would be too floppy. Now it's a bit stiff which means it'll probably wear out quicker. And the vintage handles that I had didn't unscrew as they appeared to so I had to knit them on. Not difficult but definitely more fiddly.
So there's my latest project up on this wonderful Australia Day here. Hope everyone's enjoying it and our wonderful country.
Happy Knitting :)