It's too hot around here to knit at the moment. It was 43 today and probably the same tomorrow! So I've been cross-stitching instead.
I bought some plastic coaster kits from the newsagents/convenience store. I hated the motif they wanted me to sew so I found my own. I only had three so I decided to do a monogram for my parents-in-laws and our daughter. So a B, a J and a M.
The design I found was lovely but the finished product doesn't adequately illustrate just how fiddly it was! But it was worth it for the end result.
I orientated the B a little different just for variety. But I'm very pleased.
Cross stitch is nearly as fun as knitting :-)
I love knitting, spinning, hand-sewing and tatting! So many crafts, so little time :)
Saturday 14 December 2013
Too hot!
Thursday 12 September 2013
Two Jumpers for Two Brothers!
A bit dramatic but there you go.
I have made my two sons...each!...a jumper!
 |
| Ben wearing his jumper in Holden racing colours |
 |
| And Jordan's Jacket in Arty-versus-Incognito colours |
To be honest I had difficulties of different sorts with each of the jumpers, the big difference being Jordan's I fixed and gave to him and it fit great. Ben's, I fixed and gave it to him and found I'd actually made the sleeves that I thought were too long, too short. Spewing!!!
When I picked up the stitches for around the hood and the jacket edging for Jordan's I picked up like twice the number of stitches and desperately tried to convince myself that I hadn't. When it became patently obvious that I was never going to find a zip long enough to sew beside this amazing frill of an edge I finally admitted the bleedingly obvious and regretfully unravelled the whole edge and redid it properly. Which of course turned out excellent!
Ben's sleeves on the other hand were not such a success. So those I'm going to have to remedy for him when he comes to visit soon. I'm sure I have the yarn I took out of the sleeves when I originally thought they were too long...sigh!
The pattern was excellent...until I got to the hood. Neither jumper's hood is anything like functional. Jordan's is closest because I'd already done Ben's and been worried about the slight dimensions of it but even so it could be a lot deeper and as for Ben's it's like a skullcap attached to a flap attached to a jumper! They both look their best when pushed back like an elongated collar!
But fortunately, despite the vagaries of things gone wrong they both like them a lot. Which is sweet of them :)
I'll just be happier when I get to fix Ben's sleeves!
Not that I'm obsessed or anything...
...Keep Knitting!
Thursday 1 August 2013
Brain Wave!! Why not knit something for my Family??
...yeah, I know! Shocker, huh?
Anyway I figured since I had two practically adult sons I could ask them if they'd like me to knit them a jumper and If. They. Would. Wear. It! It really doesn't count if I go to all that effort and they don't wear the article I've made!
After much assurance that Yes, they'd love that and Yes, they would wear it I went ahead and began looking for a nice men's jumper with hoodie pattern.
Do You Have Any Idea How Hard That Is To Find Such A Thing!!!
I could not believe how difficult it was to find just what I was looking for! I wanted a jumper with multiple sizes, My eldest son is average height and of extremely slender build while his little brother is nearly 6 feet (and at 19, still likely to grow more!) and is built much more solidly that his bantam-weight brother! Also I wanted a jumper with pockets. Both boys carry their phones everywhere and it was a special request from the oldest that the pockets be big enough to put a phone and a wallet in.
Ookay...
It had to be a hoodie because both boys think a knitted jumper would look too much like an article from grandpa if it didn't have a little cool added to it and I had to be able to convert the one for the youngest into a zip front because he "doesn't DO jumpers".
Great, I mean, how hard could that be to find??
I absolutely CRAWLED through everything I could find on Ravelry on men's patterns, both free and buy-able. Every time I found something it was never quite right and I soon began to get desperate! Then I found it! On the Knitty site there was a jumper called the Donut Hoodie
. While it didn't have instructions for a zip front other knitters had been able to convert the pattern to accommodate a zip. That's all I needed! It had a kangaroo pouch pocket at the front and looked just the ticket.
At first I kind of tried to wing it. I had a heap of beige acrylic and lovely charcoal acrylic that was beautifully soft so I just followed the instructions without doing any test swatch or anything on the needle sizes suggested. About a week later when I'd finished the bottom up and past the kangaroo pockets (another bonus, the pattern is knit in the round! No seams!!) I had an opportunity to visit my boys so I took the pattern and what I'd knit so far and decided I should take some measurements of them both just to make sure that what I knit actually fits them.
I'd already begun to have some doubts about the gauge I was knitting at but they were soon confirmed as soon as I showed eldest son the process so far. The gauge made it look like thick mesh bagging all over him and I could tell he wasn't hugely happy about the subdued colour tone. Afterwards I had a good hard look at all my work, swallowed hard and pulled it all out. EVERY LAST STITCH!!
Then I started going through the measurements I'd taken and looked at the range of acrylic yarns I had.
It had to be acrylic because I'm not knitting anything that can't take the cavalier treatment of bachelor wash days in their stride. I couldn't bear to get a phone call telling me that the jumper I spent ages on now fits their dashboard's bobble-head figure!
Anyway, that said, eldest son is a mad Holden fan so using the same grey I'd used before for the stripes I now used for the body of the whole jumper. I also chose a grey and a red for the stripes. Okay...here we go!
I knit a small swatch (I'm an absolute baby when it comes to swatching. I just want to start my project!) But it showed that the fabric looked better on 4.5mm needles which meant I'd be knitting the medium size even though measurement wise on the original pattern he's actually the small. But no matter! Tally-ho!!!
 |
| Body finished. Kangaroo Pocket at front. |
It was really cool when I got to knit the sleeves onto the body stitches and even more exciting when I had to graft the live stitches from the armholes of the sleeves and body together. That actually worked out much easier than I'd thought it would which was nice. As I neared the yoke decreases I began to realize that I was about to run out of the charcoal body colour. Damn!Since there was going to be no other option I had to find another colour to work in. There was no way I was doing a grey neck since the grey was so pale it would look like dirty white and the red would just be like a beacon screaming "Look at me! Look at me!!" so I used black in the same brand as the charcoal and worked it in by alternating a row of charcoal and a row of black until the charcoal ran out. It worked a treat!
So this is a pic of the newly completed jumper, nothing's sewn in yet but you can see the black going up the neck and the hood being done entirely in it (with stripes, of course!).
What you can't see is how long the sleeves are!
.jpg) |
| And there we have it! |
And now for the final reveal!!
.jpg) |
| Front |
.jpg) |
| Back |
.jpg) |
| Too cool for words! |
I am so chuffed with how this has turned out! It looks...wearable!! I swear when I give it to him I am SO getting photos!
Sigh...
Oh, yeah...now onto Youngest Sons Zip-Fronted one. Oooo. This could be interesting!
Let the Adventure continue!!
Thursday 13 June 2013
Finishing Achieved!
I am so STOKED!!
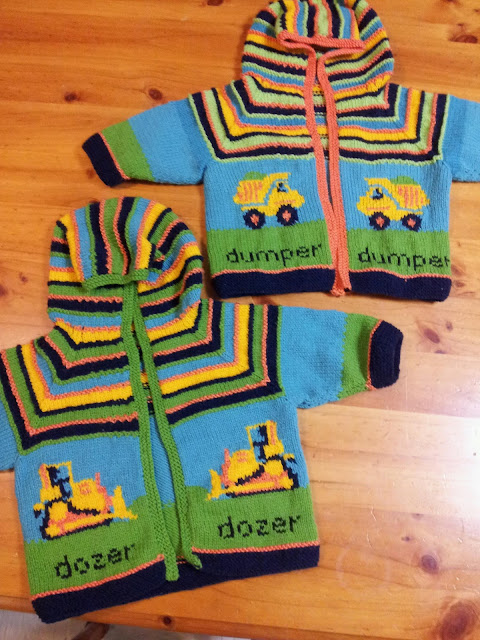
I've mentioned before that intarsia is not really a technique that I'm comfortable with but I can do it, with a bit of apprehension and gritted teeth. So I am really proud I managed to complete the knitting portion of these cardigans as well as I did.(I might wish they were better but I did my best!)
 |
| Two cardigans, knitting all completed and seamed up! |
Saturday 1 June 2013
Huzzah! I've done it!!
They are finished, oh happy day, they are done! Well, as far as the knitting is concerned any way. I love how they look! These cardigans were a real trial for me since I am very uncomfortable with intarsia. But look how nice they look! And they're both the same size!
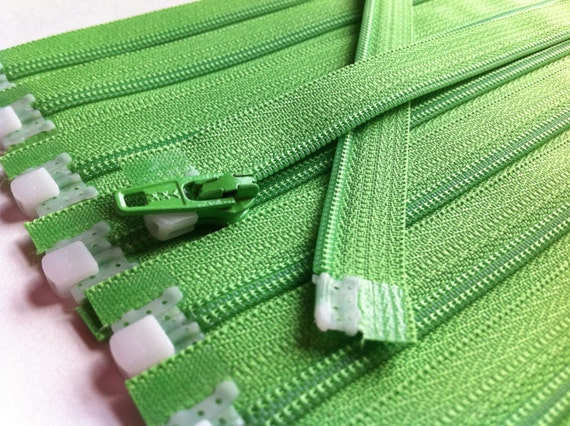
The only bit I really was disappointed with was running out of the original blue and green. Since they yarn had been gifted there was no way I could just buy more. In the end I had to plunder the stash for the closest contender. The blue was almost right but you can definitely tell where the change over is an the top of the arms. The green...wasn't even close but was the best I could do. All my other acrylic greens were too dark. So I changed the edging to orange because I wasn't having the lime green instead. Now all I'm waiting for are the green zippers I ordered to arrive and the whole project will be 100% finished! Oh joy!!
Monday 27 May 2013
I will Prevail!!
I decided to do the whole thing in the round with an extra 8sts for a steek at the front. Seemed a good idea. So off I went.
But I began to have doubts as the number of strands having to be held at the back increased from the 2 that I'm used to to sometimes 4! As I struggled on however, I began to look at the nearly completed chart section quietly mulling over how thick the fabric of the knitted garment felt and then a horrible realization came to me. I was still knitting on 3.25mm needles. I'd forgotten to change to 4mm needles. The two cardigan's would be different sizes and since they're for a set of twins this is a bit of an issue.
Oh. My. G....
There was only one thing to do. Only one thing that could be done to rectify this problem...
I was going to have to rip it all out.
Yep!
RIP. IT. ALL. OUT!
So, after accepting that, I reduced my work of a day and a half into a collection of yarn balls. Sigh.
I started again and this time I didn't do it in the round but I did knit the two sides and the back all at the same time since it seemed silly to knit them each seperately only to then seaming them together later. I did the intarsia like you're supposed to.
So now I finally finished the bottom of the cardigan. I'm still not that in love with intarsia but I think we've reached an amicable truse :-)
Sleeves are coming!
Thursday 16 May 2013
I should have thought this through...
I think I might have bitten off more than I can chew. I'm knitting 2 cardigans for my friend Kay for her twin grandkids. I'd forgotten how fiddly intarsia can be! The cardigan isn't difficult so I'm just going to push on. It really does look good :-)
Tuesday 7 May 2013
Dyeing (as in making things other colours!) is FUN!!
| 90% Wool, 10% Silk |
| After the dyeing process, just off the niddy-noddy. |
| All balled up...and so pretty!! |
| Closer view of the many gradients and variants of colour. Yummy! |
Thursday 25 April 2013
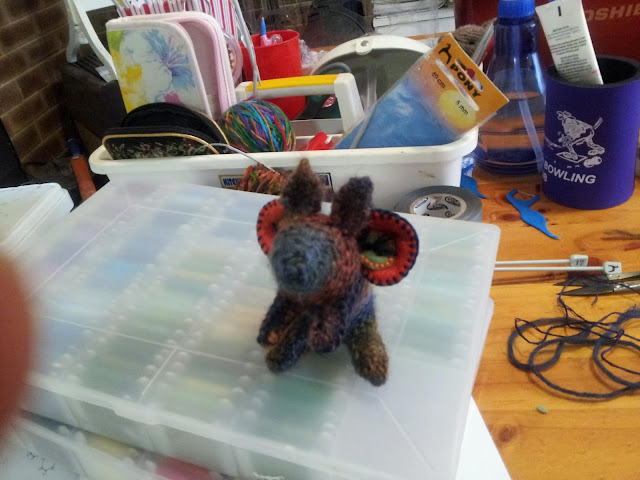
Flying pig...away!
I thought I'd have a break from the endless skirt and do something cute and fun. And it being ANZAC day all the shops are shut. Except the pubs :-)
Anyway, this was even quicker that my easter bunny! Very sweet and it naturally sits on it's bum once you've stuffed it which I thought looked really good too.
I decided to give it felt wings since I thought if I gave it wings in the same yarn as it's body that they wouldn't stand out as much and I think these are MUCH cuter!
So cute! I'm so impressed with myself :-D
Sunday 14 April 2013
Test Knitting...
So far I've done one practise poncho because it's the only way I can figure out how much yardage I use.
Friday 12 April 2013
Okay, Pattern Completed!
...And I have!
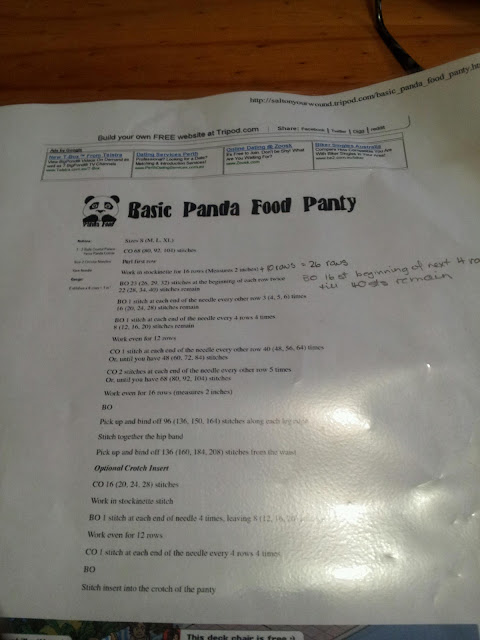
Cotton Undies
.JPG) Notions:
Notions:
Gauge:
Sizes:
Optional Crotch Insert:
Here's a thought!
I've been leafing through my OBSENE pile of knitting magazines since it really seems criminal to have so many resourses and not use them more effectively, when I had a thought!
Quite often I look through them all and think "Oh, I like that! Oh! And that!" but when I go to find the darn thing later on I can't remember what the pattern's called or the magazine it's in! So frustrating!!!
So I think I'll take a pic of the pattern when I see one I like and put it here and that way I'll at least have a visual starting point to go from if I ever decide at a later date to give it a go!!
Maybe a picture of the cover too :)
Wednesday 10 April 2013
I hate patterns with no picture!
I do! I want a picture with a pattern that the designer has made or had made so I know what they think it should look like! Otherwise how am I supposed to know I'm doing it right??
I mean, really? There's nothing here! Even the name seems oddly random! Anyway I'm going to knit this and make up a pattern sheet myself WITH a photo! If nothing else it'll help me document the changes I've done so far and be a guide should I want to do it again but different. Quite pleased with what I have so far though :-)
Sunday 31 March 2013
New Directions, new ideas...
The results were actually really pleasing. This is the perfect vehicle to display my slightly bigger motifs in a way anyone can enjoy them without the pieces getting soiled. The only difficulty I have is finding a cutter or punch that will accommodation the 5cm diameter disc I need to give the motifs adequate backing. This 4cm cutter does for the minute but I think it would look so much better if it actually fit the recess. What do you think? A key tag with a unique piece of hand tatted lace preserved for your continued enjoyment with no fear of soiling or damage to fibres? Would you buy such an item? I hope so :)


